March 17, 2011

Irish Car Bomb Cupcakes


Hello again, fellow foodies! I would love to say that my long absence from this blog meant that I had been eating a nutritious and well-balanced diet. Sadly, that is not the case. Between the job, the puppy, and the holidays, I just did not have time for my usual baking (aside from Christmas cookies, the recipes for which my mother keeps in a safe somewhere). But never fear! I have returned just in time for everyone's favorite Irish holiday.

I am not Irish, sad to say. I will admit that I left the house on March 17 wearing blue instead of green, with nary a thought of leprechauns. Thankfully, the day of drinking coincided with my usual Thursday beer sampling with my friend Max, so I was spared the trouble of trying to find a spot to sit at any of the local pubs. Instead I got to go home and wait for him to get off work. So since I had a few hours, I decided to make an appropriate St. Patrick's Day dessert - Irish Car Bomb Cupcakes!

They probably won't get you buzzed, but they are delicious. You can make them sweeter by using milk chocolate in the ganache and porter in the cake batter, and increasing the amount of cream cheese frosting. I prefer my chocolate bitter, so I used dark and unsweetened chocolate for the ganache (and there was lots leftover!), and a tangy stout from England (sorry, it's what I had on hand...Max and I really didn't need to keep extra Guinness around the house). Most recipes called for sour cream, but as usual I substituted Greek yogurt, which also decreased the sweetness somewhat. Don't like alcohol? Don't worry, you can't taste it in the cake, and there's only a hint of that whiskey flavor in the frostings. That being said, you may want to be cautious if sharing these at the office...

Otherwise, these little lovelies provide a perfectly good opportunity to celebrate the delectable and the delirious - the cupcakes are much safer than the cocktail.

Irish Car Bomb Cupcakes

Chocolate Stout Cupcakes (adapted from Dave Lieberman’s recipe)
2 large eggs, at room temperature
1/2 cup thick yogurt, at room temperature
6 oz. dark stout (3/4 cup) at room temperature (I used an Oatmeal Stout)
2 t. vanilla extract
1/2 cup dutch processed cocoa powder
1 cup sugar
1 1/4 cups all purpose flour
1 teaspoon baking soda
6 tablespoons butter, melted

1. Preheat oven to 350 degrees.
2. Line a cupcake pan with cupcake papers or spray tins liberally with canola oil.
3. Melt butter and set aside to cool .
4. In a large bowl, mix eggs, yogurt, beer and vanilla until combined.


5. Sift all the dry ingredients together (cocoa powder, sugar, flour, baking soda) into a separate bowl.


6. Add about a third of the flour mixture into the wet ingredients and blend well. Add the rest of the flour mixture, a cup at a time, mixing well after each addition. When it’s blended but still a bit bumpy, add the butter and stir until smooth.


7. Pour batter into the twelve cups, filling each only about 3/4 full (I had enough for one more cupcake leftover – baked it as a cake in a ramekin).


8. Bake on center rack of the preheated 350 degree oven and for 20 minutes, or until a toothpick comes out clean.
9. Let cool in tin on a wire rack for ten minutes then remove cupcakes from pan and let them cool completely on rack.


Whiskey Ganache (based on a basic ganache recipe at epicurious.com)
¾ cup heavy cream
8 oz. chocolate (I used a combination of dark chcolate, semi-sweet chocolate, and unsweetened chocolate)
1 oz. whiskey

In a heavy saucepan, boil heavy cream. Turn off the heat. Add chopped chocolate pieces and let it rest until melted. Use a rubber spatula to stir the mixture until all the pieces are melted. Let it cool until it comes to the consistency of a thin frosting.

Dip cupcake tops (cool, please) into the ganache and swirl around. Pick straight up, invert, and place back on wire rack.

Alternatively (and I may do this next time), if you want the chocolate flavor to be a little stronger, let the ganache cool until it comes to a spreadable consistency, then spread a nice thick layer on each.

Either way, let the cupcakes cool for 5-10 minutes so that the ganache hardens somewhat.


Bailey’s Cream Cheese Frosting
4 oz. cream cheese
1 lb. box powdered sugar
1 oz. Bailey’s Irish Cream liquor

Microwave cream cheese for 20-30 seconds and place in bowl of stand mixer. Whip until creamy, then add Bailey’s. Whip for 30 seconds, then scrape down sides of bowl. Turn mixer back on to medium speed and slowly add powdered sugar until frosting reaches desired consistency. To pipe, scoop frosting into sandwich bag, cut a small hole in the corner, and squeeze gently over the ganache-topped cupcake. If you're design inclined, cut a slightly smaller hole and go crazy...as you can see, my creativity is not of a visual nature...


Consume...preferably with Guinness, and while wearing something green. Sláinte

October 31, 2010

Treacle Tart


Some of you may be aware that there is a new movie coming out – the long awaited finale of the Harry Potter series (part one). As a big fan of J.K. Rowling’s work, I have been gearing up appropriately by re-watching all the movies and re-reading all the books. It’s actually a ritual I go through around the holidays every year, anyway – Hogwarts always remind me of Christmas. But this time I’m celebrating the release for a solid six weeks with friends, as we all watch the films on my giant TV and share our latest baked goods.

My goal every time a movie comes out is to theme the food – I’m a big fan of themes (obviously). Sadly, while Rowling mentions all kinds of exciting delicacies in her books, I just don’t know how to make any of them. What exactly is in a cauldron cake? How does one juice a pumpkin appropriately? And frankly, who wants to eat steak and kidney pie? Short of buying the exorbitantly expensive Bertie Botts’ Every Flavor Beans, it becomes difficult to really take advantage of this awesome party theme.

So I decided I would make a valiant attempt at Harry’s favorite dessert- the treacle tart. This came with it’s own problems, as I could not find treacle in my local markets, and having never tried a treacle tart, I didn’t have much to gauge it by. There were several recipes online, all of which, thankfully, used golden syrup, a British product that tastes like a cross between honey, agave, and corn syrup (any of which, or a blend, would probably be OK as a substitute). One called for eggs, which I did not use – I expect the result would make this more like a pecan pie without pecans. The recipe also calls for bread crumbs, to varying degrees – I think next time I would use less. Most also called for a frozen pie crust or a shortbread crust – my recipe is below, but feel free to substitute your favorite crust. One with ground pecans or almonds might be good.

The overall flavor is certainly what I would consider British. It’s a bit heavy, and a bit bland, but very homey. This is definitely one to serve WARM, and with ice cream or crème fraiche, or maybe lemon curd or custard (it does dry out pretty quickly). I might add fresh ginger instead of ground, and perhaps a touch of ground clove for interest. Americans will likely find it a bit odd, but I can absolutely see how, after a long wet ride across the lake, a glare from Snape, and a fight with Draco, Harry would treasure this humble and comforting, dead-simple dessert. So for those of you die-hard fans like myself, give this a try – it’s super simple to make, a great base for more exotic toppings, and a perfect accompaniment for butterbeer! Draco dormiens nunquam titillandus!


Treacle Tart
Cobbled together from about.com and Not So Humble Pie (at blogspot)

PASTRY
8 oz plain flour
1 oz fine sugar
4 oz very cold unsalted butter
1 tsp. vanilla extract
Cold water to mix

FILLING
8 oz golden syrup
1 T. molasses
6 oz fresh white breadcrumbs*
zest of a large lemon
2 tablespoons lemon juice
1 tsp ground ginger

TOPPING
Egg wash

EQUIPMENT
9” tart pan with removable bottom

DIRECTIONS
For the crust:
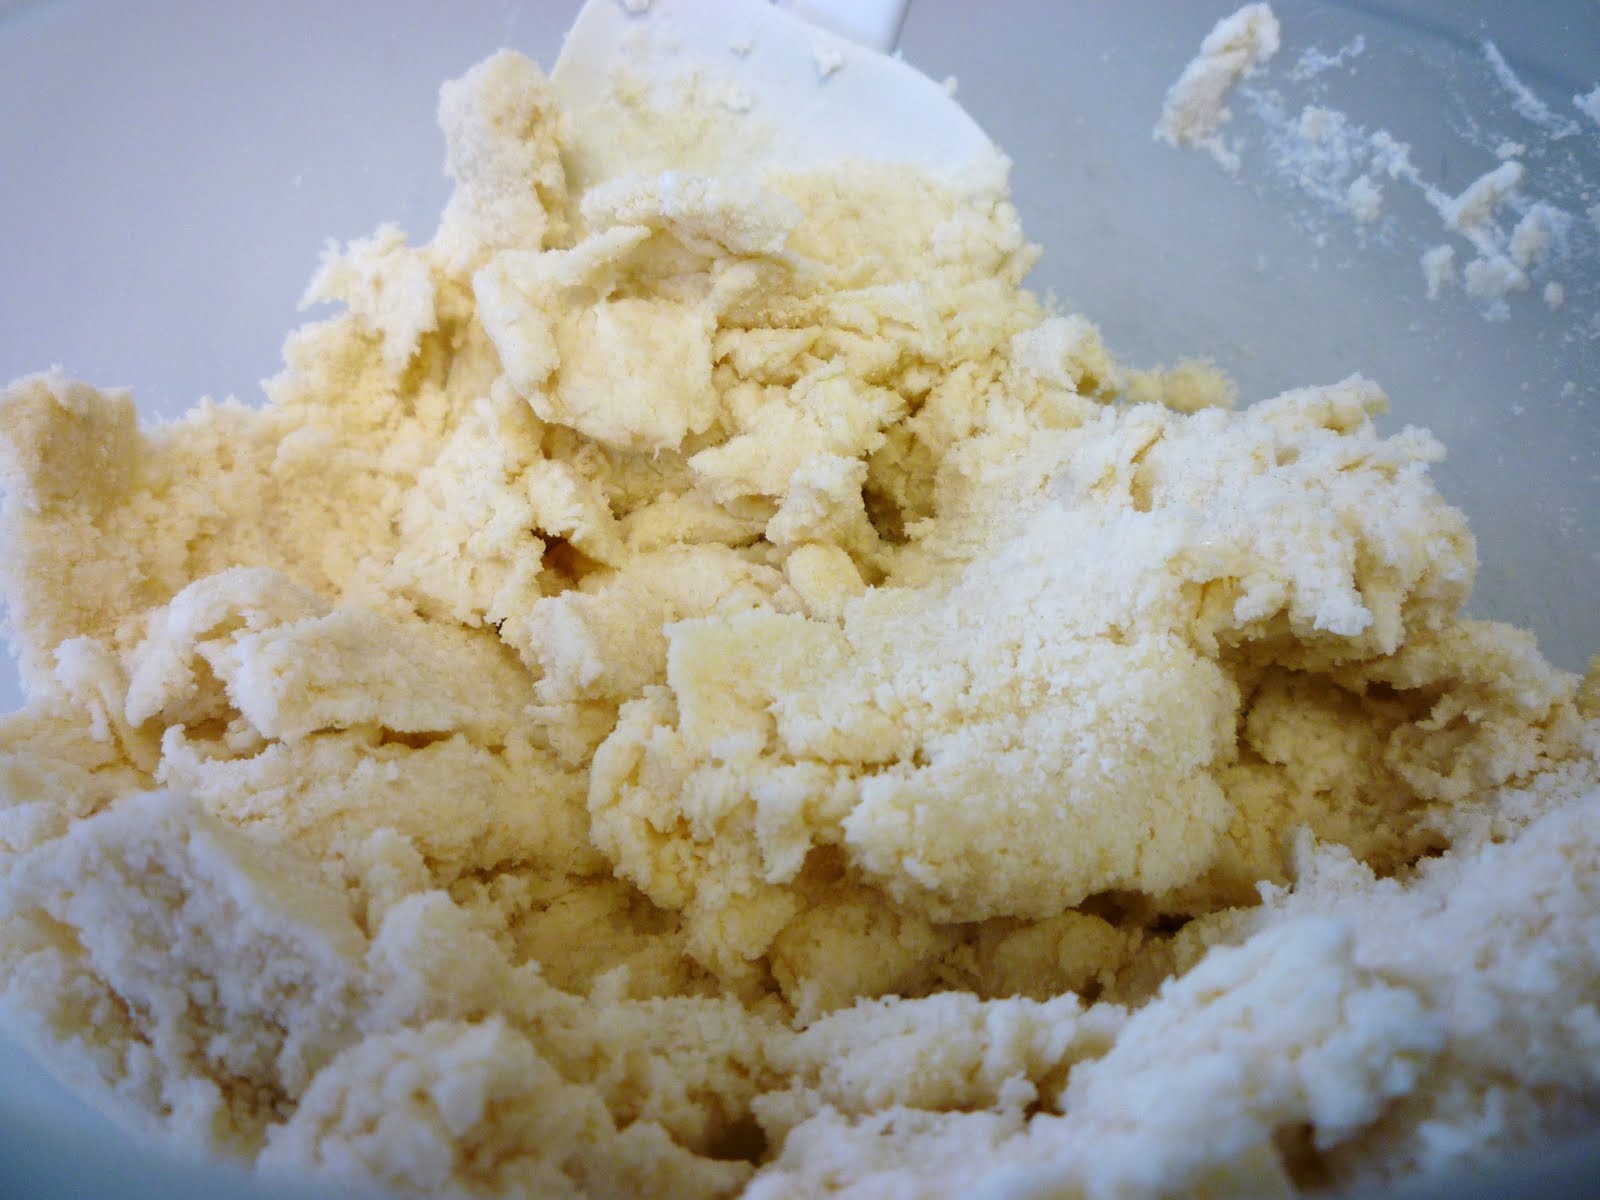
Mix the flour and sugar with a whisk or your fingers until combined. Cut butter into small pieces and combine with dry ingredients using a pastry cutter or your cold fingertips. When the mixture looks like crumbly peas, mix vanilla with 3 tablespoons of ice water and mix in gently. If dough holds together when squeezed, you’re done – if not, continue to add water a tablespoon at a time. Once dough is cohesive, briefly knead into a disc, wrap in saran wrap, and refrigerate for 30 minutes to an hour.


Remove dough from refrigerator and roll out to tart pan’s size. Press into tart pan and roll rolling pin over the top to remove excess (feel free to shape into a Sorting Hat or pumpkin to put on top). Refrigerate while you make the filling.


For the filling:
In a small saucepan, warm the golden syrup and molasses together until smooth and viscous (do not let boil).


Add ginger and lemon zest and juice, and mix to combine. Add in bread crumbs and allow the mixture to saturate.


Once the bread crumbs have taken on the juices, scoop into the prepared crust to cover the bottom (it will not expand in baking), and pop into a 375 degree oven for 20 minutes.


Cool very briefly on a wire rack (no more than 5 minutes), then top with something yummy and serve with pumpkin juice or a goblet of Rosmerta’s best mead.

September 30, 2010

Fall in New England (Bread)


This week was Mountain Day. For those of you not fortunate enough to attend Smith College (the best college in the world), Mountain Day is a day designated by the college president as a surprise day off. One day in the fall, when the weather is pleasant, the leaves are turning, and the apples are ripe, the college bells will ring through the morning. This is a sign to all women that class is canceled. Traditionally, the day is meant to be spent having picnics by Paradise Pond, climbing Mt. Tom (a small hill they think is a mountain – so cute), and picking apples at a local orchard.

This has been going on since 1877, and as one might expect, the late September/early October students often hedge their bets for this cherished holiday (i.e., “No, don’t study for that test – I hear Mountain Day will be that day”). As I found out after graduation, Mountain Day is also precious to alumnae. It brings back wonderful memories of carefree autumn days, while we are all now shut up in our offices and apartments, hoping to do something useful with that amazing (and expensive) education.

In an effort to capture some of that Mountain Day feeling, and officially begin my fall baking (it’s my favorite season!), I looked around for something with pumpkin in it. Yes, apple would have been simpler and more appropriate, but I prefer the richness of pumpkin to a bland apple any day. Lo and behold, I located this recipe on the always helpful epicurious, and began changing it to suit my tastes and pantry. It may be a bit more Thanksgiving than Mountain Day, but the scents of fall are what count, and it is no less tasty for being a wee bit early! This is wonderful for breakfast or with your afternoon tea (every Friday at 4pm in the house living room), and while the baking time was longer than anticipated, the result in dense, moist, and very flavorful. If you like your breads a little less sweet, try using fresh cranberries - for a dessert, add dark chocolate bits. It's an easy recipe to transport you to a better time - like your years at SMITH COLLEGE!


Fall in New England Bread
based on Cranberry-Walnut Pumpkin Bread, Bon Appétit, October 2003

BREAD

2 cups all purpose flour
Spices: 1 T cinnamon, 2 tsp ginger, 1 tsp allspice, ½ tsp ground cloves, several grinds of nutmeg
1 teaspoon baking powder
1/2 teaspoon baking soda
6 tablespoons (3/4 stick) unsalted butter, room temperature
1 cup sugar
2 large eggs
1 cup canned pure pumpkin
1 teaspoon vanilla extract
1 teaspoon maple syrup
2/3 cup yogurt
3/4 cup dried sweetened cranberries
3/4 cup coarsely chopped walnuts
STREUSEL
3 T. brown sugar
2-3 tsp maple syrup
6 tablespoons coarsely chopped candied ginger

Preheat oven to 350°F. Butter 9 1/4x5 1/4x3-inch loaf pan. Line bottom and 2 long sides with waxed paper. Whisk flour, spices, baking powder, salt, and baking soda in medium bowl to blend.


Cream butter and sugar together. Beat in eggs, 1 at a time, followed by pumpkin, then vanilla and maple syrup. Add dry ingredients alternately with yogurt in 2 additions each. Fold in cranberries and nuts. Transfer batter to pan.


Bake bread until tester inserted into center comes out clean, about 1 hour to 1 hour 45 minutes – apparently I really need a new loaf pan. When the loaf is solid and starting to brown on top, add the streusel made from the last 3 ingredients. If the top begins to burn, cover with foil.


Cool bread in pan on rack 15 minutes. Cut around bread at short ends to loosen from pan. Turn bread out onto rack; peel off waxed paper. Cool bread completely, and store in Tupperware in the refrigerator. To serve, let the loaf come to room temperature, or toast individual slices and serve with cream cheese.

September 19, 2010

Mandelbrot


It has been a busy summer. In the course of the last two months, I have started a new job, moved, and brought home a puppy. This has significantly cut into my baking time. But now that the boxes are put away and the puppy is housebroken (sort of), I can get back to my favorite pastime – EATING!

Sadly, this coincides with a period I do not usually associate with the gourmet high life – the Jewish high holidays. Admittedly, no one in my husband’s family does a lot of cooking, so my experience is pretty narrow, but generally speaking I find the culinary traditions of his people to be a bit bland. And every year, I come up with great recipes for the holidays and simply run out of energy to make them (hey, it’s a busy time of year). But I choose one easy Jewish dish a year and make the effort to try it out and find the tasty ones (why does no one like kugel except me?). For 5771, with very little time and nowhere to leave the pup while I went grocery shopping, I was stuck with limited options. So the winner was – MANDELBROT!

Mandelbrot are very similar to biscotti, without the jaw-breaking quality. They are best served with coffee, espresso, or a brut champagne to bring out their sweetness (because they aren’t very sweet). This actually works out nicely for my husband’s family, who prefer less sugary desserts. They are quite easy to make, and it’s one of those recipes that yields a million variations once you have mastered the basics. I encourage you to add cranberries, dried apricots, chocolate chips, or whatever suits your fancy. This plain-Jane version is the most traditional, and still quite tasty.

Incidentally, the recipe comes to you from a cookbook given to me by a family friend at my bridal shower. She felt it was essential for my marriage.  L’chaim, and a belated Shana Tova!


Mandelbrot
From The Jewish Kitchen: Recipes and Stories From Around the World, by Clarissa Hyman

Makes 2 dozen

Ingredients:
2 eggs
½ cup superfine or caster sugar
6 Tablespoons vegetable oil
2-3 drops almond extract
2 ½ cups flour SIFTED WITH 2 teaspoons baking powder
1 cup coarsely chopped almonds (she says blanched, I say toasted and any kind you have in the freezer)
Egg wash (1 egg + 1 Tablespoon water)
1 Tablespoon sugar
1 cup chocolate chips melted with 1 Tablespoon oil

Directions:

Whisk together eggs and sugar, then add oil and almond extract.


Add flour and mix lightly, then add almonds and mix until dough just comes together. Flatten to a disk and refrigerate several hours to overnight (Short on time? Throw it in the freezer for an hour or two).


Preheat the oven to 350 degrees.

Divide the dough in half, and shape each half into a log 3 inches in diameter. My logs usually end up rather flat (from the habit of making biscotti), so don’t worry about the shape too much. If the dough won’t hold together, add a tablespoon of water and knead a bit. Try not to do this more than once.


Brush the logs with the egg wash, sprinkle with sugar, and pop onto a greased and floured baking sheet. Into the oven for 30 minutes, until just barely brown. LEAVE THE OVEN ON!


Let the logs cool on a rack for 5-10 minutes – until they are still a little warm, but not hot. Use a serrated knife (I find a tomato knife works best) to cut ½ inch slices, on the diagonal if you can manage it. This is tricky – assume you will destroy several prospective cookies.


Return the slice to the oven, and allow to cook until light brown on each side – 5-7 minutes, then turn them, and bake 5-7 minutes more. Cool completely on the rack.


Once cool, use a fork to drizzle them with the melted chocolate and oil “artistically”. The oil should help thin it out and make life slightly easier. Think Jackson Pollack on the kitchen counter (lay down paper towels under the racks in advance). Allow to harden (will not harden completely), then pack into a Tupperware. Serve after Rosh Hashanah dinner with coffee.

July 6, 2010

Pâtisserie Fruit Tart


I’m competitive. There, I said it. Once, at a team building event, someone asked me why, and I replied that I didn’t really see the point of doing something if you’re not trying to be the best. It may have earned me some funny looks, but it’s true. I’ve lost a lot of hobbies this way.

Now, I am not the best baker in the world, but occasionally, I’m the best on a given day in my small circle of friends, co-workers, and colleagues. I am unashamed to admit that the incredulously uttered words “Oh my gosh, you MADE that?!?” bring a smile to my face every time, and if you bake for others, I know very well you feel the same way. This praise is especially heartwarming if a) you slaved over a particular dish, and those compliments come well-earned or b) you spent zero time and effort and people are STILL impressed…which brings me to today’s project.

Certain baked goods can be found in any pâtisserie – flourless chocolate cakes, macaroons, tiramisu, and finicky little fruit tarts. The fruit tarts are a crowd-pleasing favorite, nicely balanced between rich custard and slightly acidic fruit, with a buttery crust. And every time I buy one, I say to myself “I could make these…oh, here’s your five dollars” (inevitably, for a 3” mini-tart). So finally, after looking at the embarrassment of cheap berries at the market, I decided I’d try my hand at it, and guess what? Not that hard! But so fancy lookin’!

I make the following recommendations to anyone trying it: allow yourself an afternoon, or morning if you’re so inclined – the crust must rest twice and then cool; use small berries (blueberries and raspberries) that can be laid on whole – this decreases the chance that your custard will end up smooshy after the juice from, say, peaches, drained on your masterpiece; feel free to pile up as high as gravity and your pocket book will allow, but designs work better with less fruit; and BE CAREFUL to only hold your tart pan by the edges – we’re used to using the bottom of a pan for stability, but put the slightest pressure on this one and you will destroy your hard work…trust me. The custard does set up firm, so if you prefer the creamy stuff, make the dough, bake it blind, then fill with Bird’s Custard (made with ½-¾ the usual liquid). Other than that, let your inner high-end pastry chef run free. You’ll be ready to impress at the next holiday gathering.


Pâtisserie Fruit Tart
Adapted from Joanne Harris’ Blueberry Tart, in My French Kitchen (and if you haven’t read Chocolat, do it now)

Ingredients


For the pâte brisée:
1 ½ cups flour
12 tablespoons (1 ½ sticks) butter, chilled and cut into small pieces
1 tablespoon sugar
1 egg
½ tablespoon cold water

For the custard:
¾ cup heavy cream
2/3 cup sugar
2 eggs
3 tablespoons flour
1 teaspoon vanilla extract
Zest of one lemon

For the top:
1 pound berries of your choosing
(I used 1 basket strawberries, 1 small clam blueberries)
¼ cup apricot jam, with large pieces removed, microwaved for 30 seconds (until bubbling)

Special equipment:
Tart pan with removable bottom

Directions

Begin by making the crust. In a large bowl, add butter to flour. Using a rubbing motion with your fingertips, incorporate flour into butter, until mixture resembles coarse bread crumbs. Mix in sugar, then add egg and water with a pastry blender or a couple of butter knives. Use a cutting motion to mix the wet ingredients in, eventually forming a dough ball. Knead this ball briefly to ensure even mixing, then shape into a 6 inch disk (you can always pat it into the bottom of your bowl). Wrap the disk in plastic wrap and make yourself a cup of tea while it chills in the refrigerator for 45 minute to 1 hour.


When you’re ready to go back to work, remove the dough to a well floured surface and unwrap. Using a floured rolling pin, roll the dough into a circle a few inches larger than your tart pan. Spray pan with nonstick spray and then carefully maneuver dough into place, trimming excess by rolling over the top or with a paring knife. Do try to make the crust the same thickness around the sides. Place pan (carrying ONLY by the edges, or your work will be wasted) into the refrigerator and read another chapter of Harry Potter (substitute your favorite 20-30 minute activity here). Preheat the oven to 400 degrees while you wait.

Pull out the lower rack on the oven (in the lower third, but not the bottom). Remove the pan from the refrigerator and place on the rack. Cover in a piece of foil, and add pie weights or dried beans. Close oven and blind bake for roughly 10 minutes, until the sides of the pastry are nearly dry. Cool on a cooling rack for 10 minutes.

While crust cools, combine all custard ingredients in a medium bowl and whisk until combined. Spray cool crust with nonstick cooking spray, and place back on oven rack. Pour custard in, push rack into place, and close oven.

Bake for 25 minutes, reducing temperature to 375 degrees and covering tart with a piece of foil (the one you used for pie weights will do nicely) 10 minutes in. Thereafter, check on the tart every 5-10 minutes. If it leaks (don’t worry, it happens), place a sheet of foil or an extra rimmed baking sheet underneath it, on the extra rack (but not too close to the heating unit, or it will catch fire). When the custard starts to puff, has a firm texture, and is golden brown on top, it’s done. Remove carefully, by edges of pan, and cool on rack for 1 hour. This is a good time to slice strawberries or other juicy fruits if you are using them, so that they can drain any extra juices while the tart cools.


Once the tart is cool, remove from pan by pushing up on the removable bottom. Make sure the plate you will serve it on is FLAT, or your tart will crack (cheater tip – if it won’t slip off the pan bottom, just leave it on, as it won’t show…just be careful when cutting). Once plated, arrange berries over the top to your artistic liking (another cheater tip – you can glaze with apricot jam first if you’re worried about the fruit staying put), and using a silicon pastry brush, glaze the berries with the melted apricot jam (if you are serving immediately, you may omit this step if you like). Serve with a garnish of mint leaves and accept compliments graciously – just don’t tell them how simple it was.

June 28, 2010

Perfect Peach Cobbler


Is there a more irresistible sign of summer than a farmer’s market full of stone fruits? They have such a short season that if you blink (or go on vacation at the wrong time), you’ll miss the best bites. So you have to make the most of the plums, peaches, apricot, and cherries while they’re available. And of course, that means dessert.

While there are any number of delicious ways to serve fresh, baked, or grilled peaches, I think the absolute classic is peach cobbler. I make a lot of cobblers over the summer, and a lot of crisps in the fall, as “healthy” desserts (I know, I know – but for me this is pretty close). But the tough thing about these fruit based desserts is that the texture varies considerably according to how ripe the fruit is, how juicy, how firm – all the things you really don’t know until they’ve cooked up. While most are still edible, they are unpredictable. But never fear – I found the answer.

Cook’s Illustrated (one of my favorites – the magazine equivalent of Alton Brown) published a peach cobbler recipe a few years back that I unearthed recently when cleaning out my cookbook shelves. They’ve managed, as usual, to take a classic recipe, deconstruct it, and re-assemble the ingredients with scientific accuracy and delicious results. Here, the peaches are coated in sugar and drained, ensuring you have just the right amount of liquid (texture is perfect). The biscuit dough uses yogurt to provide a hint of tanginess without sacrificing that cakey crumb. And the whole thing is easy to put together in an hour, while watching the Disney channel and talking on the phone with your buddy in New York (I checked). So here is there recipe, edited down but essentially unaltered, and may you enjoy your summer fruits while they last. Happy Fourth of July, folks!


Perfect Peach Cobbler
Edited from Cook’s Illustrated

Filling Ingredients:
2 ½ pounds fresh peaches (6-7 medium, organic if you can)
¼ cup sugar
1 tsp. cornstarch
1 tsp. lemon juice (fresh squeezed is always best)

Biscuit Topping Ingredients:
1 c. all-purpose flour
3 T. sugar plus more for sprinkling
¾ tsp. baking powder
¼ tsp. baking soda
5 T. cold butter, cut into ¼ inch cubes
1/3 cup whole milk yogurt (I used nonfat Greek, as usual)


Directions for Filling:
Preheat oven to 425 degrees. Place rack in lower third of oven.
Peel peaches, halve and pit. * Note: peaches can be refrigerated overnight, and then peeled with a vegetable peeler. Alternatively, you may use the “blanch and shock” method. Remove hard or dark flesh from the area around the pit. Cut each half into 4 wedges (i.e., 8 wedges per peach). Toss with the ¼ cup sugar and let stand for 30 minutes, tossing every 5 minutes. Drain peaches, reserving liquid in a bowl. Whisk ¼ cup of liquid (discard remainder, or combine with rum as your cocktail) with cornstarch and lemon juice. Add peaches back and pour the lot into an 8 inch square glass baking dish. Bake in oven for 10 minutes, until peaches are just beginning to bubble around the edge.


Directions for Biscuit Topping:
While peaches are in the oven (so that dough doesn’t dry out), combine flour, baking powder, baking soda, and 3 tablespoons sugar in a food processor. Pulse briefly. Add butter, pulse just until mixture forms a coarse meal. Transfer to a medium mixing bowl and add yogurt stirring until just combined (overmixed dough will make tough biscuits). Break dough into 6 portions of identical size, making them slightly flattened golf ball shapes.


Directions for Baking and Serving:
After peaches have baked 10 minutes, remove from oven and place biscuit mounds on top (see pattern – you don’t want them too close). Sprinkle dough lightly with sugar (cinnamon might not be bad either) and return to oven for another 15 minutes. The cobbler should be golden brown on top, with bubbling fruit beneath. Cool on a rack for 20 minutes, then serve warm with vanilla ice cream or whipped cream. Cobbler may be reheated at 350 degrees until heated through.

June 16, 2010

Sweet Cherry Pie


My mother doesn’t make pie. As a rule. The occasional apple crumb pie would make it onto our table, but even that was rare. She found crusts, filling consistency, and baking tricks to be way more trouble than it was worth. And for a mom who was already working full time, leading multiple Girl Scout troops, and making our Halloween costumes by hand, that seems plenty fair to me. Good thing I have more free time.

Several years back, my husband requested me to make a pie for Thanksgiving. In an effort to be super-girlfriend, I tried (and succeeded) in making my first-ever pie. My mother was shocked and amazed. Now I make it every year at Thanksgiving, and expanded my repertoire to include a decent mixed berry pie for the summer.

So this week, when I walked into the supermarket and found cherries for 99 cents a pound, I decided, why not? Despite the fact that I had never even tasted a cherry pie, it is after all an American summer tradition – I should at least give it a try. So I found some recipes, mashed them together, and produced a cherry pie that looked just like the pictures…sort of.

I came to the following conclusions, which may serve you well. A) Lattice crust tops are not worth it. They take down the crust to fruit ratio and never look as nice once they’ve been baked and gone all wonky (read: uneven). B) Use sour cherries. Mine were sweet, and with the added sugar, they were a little too much. Excellent for children and super sugar cravings…sober adults can cut it with vanilla ice cream or whipped cream. C) Don’t overdo it with the sprinkling sugar…or you’ll do what I did, accidentally spilling it in a few spots with turn a lovely shade of black (teehee). However, the texture set up nicely (doesn’t it stand up well to photography?), I finally got to use the cherry pitter I got for my wedding nearly two years ago, and the pie certainly did make it feel like summer. Serve with lemonade and eat on your front porch, watching fireflies.


Sweet Cherry Pie
Adapted from
Classic Sour Cherry Pie with Lattice Crust, Bon Appétit, June 2008
and
Cherry Pie, Gourmet, July 2007

Ingredients
Crust:
1 tsp. almond extract
¾ c. butter, cut into half inch dice and chilled
1/3 c. shortening, cut into half inch dice and chilled
2 1/2 cups unbleached all purpose flour
1 tablespoon sugar
Just enough ice water to hold dough together (5-7 T)

Filling:
2/3 c. sugar
6 cups whole pitted sweet cherries (about 2 pounds whole unpitted cherries – pitting will take 30-40 minutes)
5-6 T. cornstarch
1 T. orange zest
1 I. orange juice
1 teaspoon almond extract

Assembly:
Milk or egg wash (2 T)
Sprinkling sugar


Directions
Whisk flour and sugar in large bowl to blend. Add butter and rub in with fingertips until small pea-size clumps form. Add extract, then ice water a tablespoon at a time; mix lightly with fork or hands until dough holds together when squeezed, adding more water if dough is dry. Gather dough together; divide into 2 pieces. Form each piece into a 6 inch disk and wrap each in plastic. Refrigerate at least 30 minutes (can be made 2 days ahead – keep chilled). Let dough soften slightly, 10 minutes or so, before rolling out.


Position rack in lower third of oven and preheat to 425 degrees. Whisk sugar and cornstarch in medium bowl to blend. Stir in almond extract and orange zest, then add cherries and mix well; set aside to rest for 30 minutes.

Roll out first dough disk on floured surface to 12-inch round. Transfer to 9-inch glass pie dish. Trim dough overhang to 1/2 inch. Roll out second dough disk on floured surface to 12-inch round.


To Make Lattice Top:
Using large knife or pastry wheel with fluted edge, cut ten 3/4-inch-wide strips from dough round. Transfer filling to dough-lined dish, mounding slightly in center. Dot with butter. Arrange dough strips atop filling, forming lattice; trim dough strip overhang to 1/2 inch. ALTERNATIVE: Lay top crust over filling, cutting 3-4 steam vents in the middle.

Fold bottom crust up over ends of strips and crimp edges to seal (or take extra dough, trim, and roll into ropes – use these to form a faux crust to crimp). Brush lattice crust (NOT edges) with milk or egg wash. Sprinkle lattice with 1 tablespoon sugar (and no more!).


Place pie on rimmed baking sheet to catch drips and bake at 425 degrees for 20-25 minutes, then another 50-60 minutes at 375degrees, until filling is bubbling and crust is golden brown, covering edges with foil collar or pie shield if browning too quickly. Let cool on rack 3-4 hours.

Don’t even think about serving this without vanilla ice cream.